What is the single most distinguishing feature of South Florida?
It’s not tourists, not retirees, nor the humidity.
It’s the flatness – this country is incredibly flat. In many ways, living down here is a lot like living in a kind of Flatland (remember that story?). Consequently, like for so many, my photography was also seemingly trapped in just “two dimensions”. In my quest for a new angle, I have gone to some modest heights to bring back interesting images from the third dimension.
Think of this as low altitude but with a higher attitude!
.

Birds-eye view from the third dimension.
Little Rabbit Key in Florida Bay.
.
After seeing my Aerial VR Panoramics, large format prints and unique birds-eye views of the Everglades, people are always asking me how I do it. When I first wrote this some years ago, it was called Pole Aerial Photography. Today with ubiquitous selfie sticks in every tourist’s hand, it could be called Really Long Selfie Stick Photography! 😉
While I certainly did not invent the pole photography idea, I have however developed & perfected my own technique.
Also, as far as I’m aware, I may well have been the first to apply this type of aerial photography technique to the outback Everglades and especially from the seat of a moving kayak!
.
.
Using what I already had, at first I started with a 6 foot monopod and a DLSR cam with a fisheye lens. This was roughly equivalent to a selfie stick with an action cam but with much better resolution. It produced some interesting enough results that I decided I definitely needed more ALTITUDE !
.

Kayaks in the Ft Lauderdale Winterfest Boat Parade. Monopod with DSLR and small flash.
.
:WARNING:
I am describing to you my method and only what has worked for me. Use any and all information at your OWN RISK! If you decide to try some aerial photography, know that what goes up must come down. Use common sense and be mindful of your surroundings and aware of the situation you are in! There is a real risk of TOTAL equipment loss!
Think, twice – no three times before deciding to do anything like this in a populated area and watch out for power lines and trees!
Your flying camera can seriously hurt you and/or other persons and property – PAY ATTENTION!!
:WARNING:
.
.
Doing some research, I looked at kites, balloons, even model airplanes and Drones. My criteria were simply that it be cheap, simple, portable, reliable and safe. Between all the factors, like cost, size, portability, choice of cam, charging batteries, etc .. most people today opt for some type of a Drone. However, for my application the pole does have it’s merits as Drones are not allowed in national parks! I therefore decided to carry forward this principle but on a much longer scale.
.
.
Kites and balloons will go as high as you care, but after a certain height, your pics will all start to look a lot like Google Earth closeups. In terms of height, a pole could be 15, 25 even 35 feet tall. My method then is very much low altitude, yet enough attitude to convey that elevated bird’s-eye view. It also relies on quite a bit of post processing to get the best results, so it may not be for everybody!
.
.
A typical DSLR cam with a fisheye lens is a combination that can weigh 4 to 5 lbs. That doesn’t sound like a lot, until you hang those 5 lbs on the end of a stick 25 feet away – that’s when leverage comes into play. I eventually moved on to a small mirrorless cam with fisheye, which weighs only a fraction of that.
.
.
Regardless of the cam, one thing that quickly becomes apparent, is that the longer the pole, the more leverage and torque will need to be exerted to raise/lower and keep steady. It’s just simple physics and there needs to be a counter-weight at the base. Keep in mind that even with the counterweight it’s always a handful, sometimes very difficult to handle if there’s wind!
The downside to a heavy base foot is that it tends to sink into the soft mud! I had a real close call this one time in the middle of nowhere just as I was raising the BIG pole, when all of a sudden the force pushed me down into the soft mud to my knees! I was stuck! Pole over the shoulder with a camera dangling 25 feet away and no way to move. As I contemplated my options, the foot suddenly kicked up, which meant that the top went down, and so the cam just ever so “kissed” one of the many sea water puddles in the low tide mud flat. At that point I knew I had to act fast and pushed against the pole, prying myself out of the mud, racing to the dunked cam, fearing a “kiss of death” total loss. Well it did get wet, but by chance hit the back lcd screen. Clearing off any liquid, I rubbed some hand sanitizer alcohol gel into the buttons. Camera was acting spastic, going though menus all by itself, it was shorted! That was the end of that session!
In a desperate effort, I later actually re-wet the back of the cam with some fresh water & after more alcohol and several drying cycles it works perfectly to this day. Moral of the story?
Watch your STEP and need MORE counterweight! 😉
.
To actually take the pics, the cam is set on a timer that takes a pic every few seconds. As the cam keeps taking pics, supporting and stabilizing the pole becomes the primary objective. It’s actually a good amount of work and I feel less a photographer and more like a technician gathering the data points.
.
.
.
Above, standing on First National Bank raising the BIG pole. Result is below:
.

Result from above: Aerial birds-eye 360 panoramic of First National Bank in Florida Bay.
CLICK for VR 360 aerial panoramic!
Large panoramic prints also available!
.
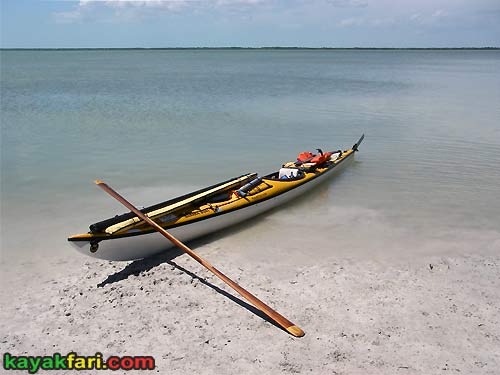
On my 20 ft sea kayak, the pole sections just fit on the foredeck and are light enough not to effect anything significantly. The heavy counterweight foot rides at the bottom of the back hatch, nicely also lowering overall CG and stability feel in 4 – 6 foot seas that I’m willing to paddle in!
.
.
.
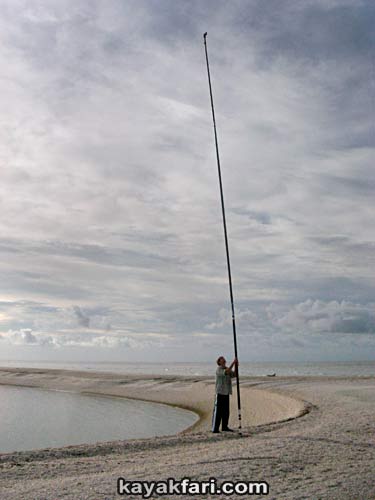
The BIG pole now stands at 34 feet (10 meters), but I am looking to get even higher. Eventually it’s gonna top out at just over 40 feet tall which I feel will be the final “safe” limit! The BIG pole is always used planted on the ground, so it’s much more stable than the hand held versions.
.
.
.

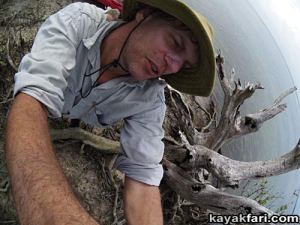
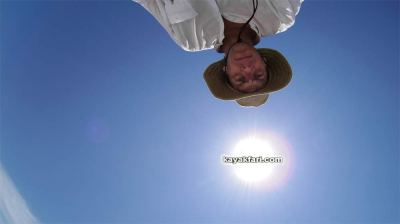
Sometimes you get a surprise shot accidentally as the cam keeps taking pics .. until you turn it off.
.
Aerial VR Panoramics
.
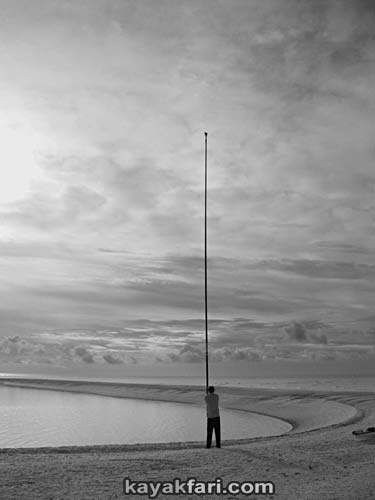
The BIG pole at 34 ft (that’s 10 meters!!) is close to the practical limit for handling, portability & safety.
Photo credit: Russell Van Riper.
.
.
:WARNING:
I am describing to you my method and only what has worked for me. Use any and all information at your OWN RISK! If you decide to try some aerial photography, know that what goes up must come down. Use common sense and be mindful of your surroundings and aware of the situation you are in! There is a real risk of TOTAL equipment loss!
Think, twice – no three times before deciding to do anything like this in a populated area and watch out for power lines and trees!
Your flying camera can seriously hurt you and/or other persons and property – PAY ATTENTION!!
:WARNING:
.

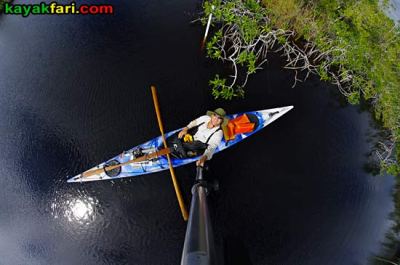
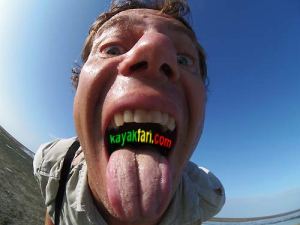
Kayak aerial photography self portrait over the Eastern Everglades.
.
Another type of pole I made can easily be deployed right from the seat of the kayak! It’s the one I used for those really cool birds-eye panoramics of the Eastern Everglades Expansion Area and the Shark River Slough trips.
.
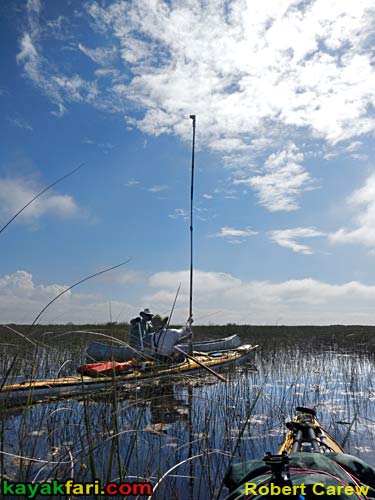
Setting up the pole on the Shark River Slough in the Everglades.
Photo credit: Robert Carew.
.
Seat of the kayak view vs. birds-eye view!
.

Result from above: Sweeping aerial panorama of paddlers on the River of Grass!
CLICK for VR superwide aerial panoramic!
Large panoramic prints also available!
.
.
From the same spot .. dramatic example of perspective change from foot level (above) to tree-top level (below) – about 18 feet up.
.
.
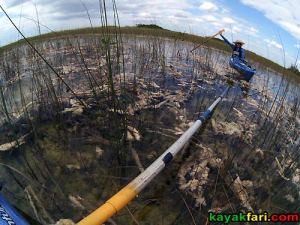
Setting up medium pole on the Taylor Slough.
.

Setting up for aerial in the Bill Ashley Jungles in the Everglades.
.

Result from above: Aerial panorama in the Bill Ashley Jungles (Herman Lucerne backcountry).
CLICK for VR 360 aerial panoramic!
Large panoramic prints also available!
.
.
Since the pole is sectional, I can adjust the height to what works best in a given situation. Big thanks to “Kayak Erica” of www.allamericankayak.com for these great pics of me in action!
.

Result from above: Aerial birds-eye Cypress Dome panoramic from maybe 22 feet up!
CLICK for VR 360 aerial panoramic!
Large panoramic prints also available!
.

In the tree and poking up above the canopy over the Shark River slough.
Kayaking at Shark Valley – A visit to Seagrape Hammock, aka Willoughby Key!
.
.

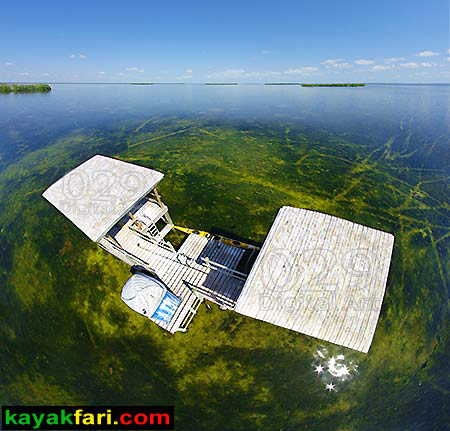
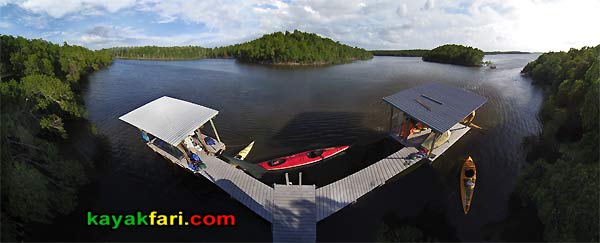
Result: Aerial view of the chickee and crooked Creek!
Gone up Crooked Creek to have a little chickee camping fun!
.
.
.
.
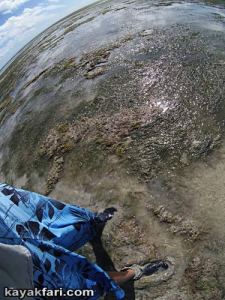
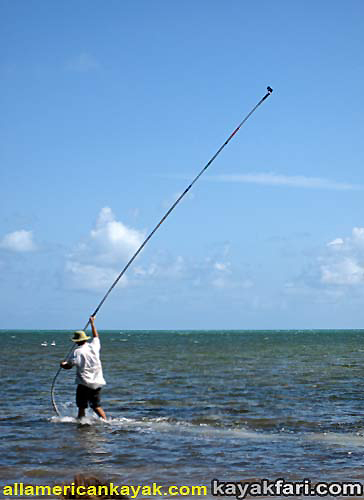
Wading in the low tide above. The result is below from about 28 feet!
.

Jonathan Seagull’s view of Upper Sound Point on Rattlesnake Key in Garden Cove, Key Largo.
CLICK for VR superwide aerial panoramic!
Large panoramic prints also available!
.
.
Below: Result aerial panorama over Bradley Key from about 28 feet up!
.
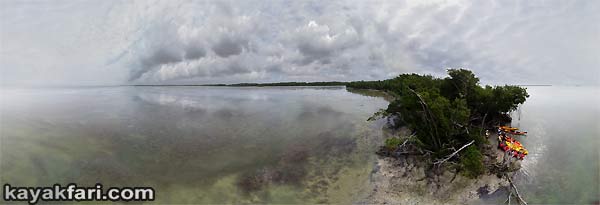
Aerial birds-eye view of point on Bradley Key point in Florida Bay, Everglades National Park (just a couple of miles west of Flamingo).
This key is named in honor of Guy Bradley, an Audubon Warden shot and killed by bird poachers about 100 years ago – one of the defining moments that led to the establishment of Everglades National Park!
CLICK for VR 360 aerial panoramic!
Large panoramic prints also available!
.
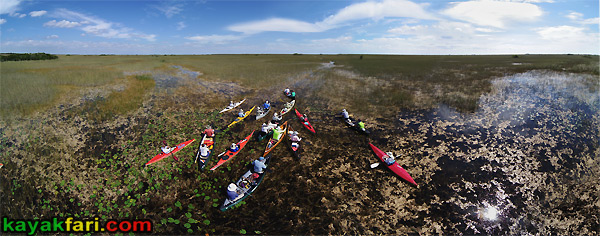
Kayak Aerial Photography over the East Everglades Expansion Area.
CLICK for interactive panorama!
.
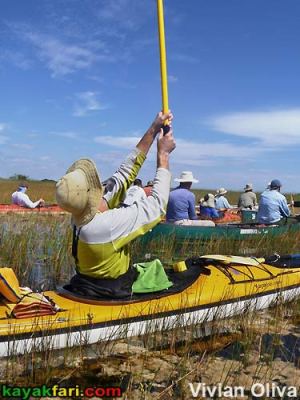
Above & below: Bird’s eye view vs Canoe level view.
Big thanks to Vivian Oliva for capturing me in action from the same spot!
.

Kayak Aerial Photography over the Everglades prairies.
Grass Paddling in the East Everglades Expansion Area – History, Gladesmen & more Grass!
Photo credit: Vivian Oliva
.
.

Poling on one end, cam on the other! Water Conservation Area 3A.
Grass paddling and poling in the Everglades Water Conservation Areas.
Photo credit: Carmen Ferreiro.
.
.

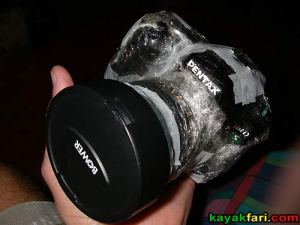
“I’m gonna Put It On (the lens cap)”
CLICK for interactive panorama!
.
Your choice of camera will dictate how high you can go. Action cams like the GoPro series are very light & would seem like a good choice, but they are really meant for filming. For stills, they, along with camera phones aren’t the best choice if you want to make large prints and do post processing. On the other end full size DSLRs will give great image quality at the cost of size & weight. The newer breeds of the “mirrorless” cams with a matching fisheye lens hit the sweet spot. I’m still using the Pentax Q which gives excellent results and is the lightest smallest cam that accepts a dedicated fisheye lens. It’s also real fun to use and surprisingly versatile.
The Q is the “little cam that could!”
The Pentax Q is so tiny, it’s smaller than your iPhone and lots of times people don’t even notice that there’s a camera at the end of that big ol’pole.. 😉
.
NEW sister site @ www.AwakentheGrass.com
.
.
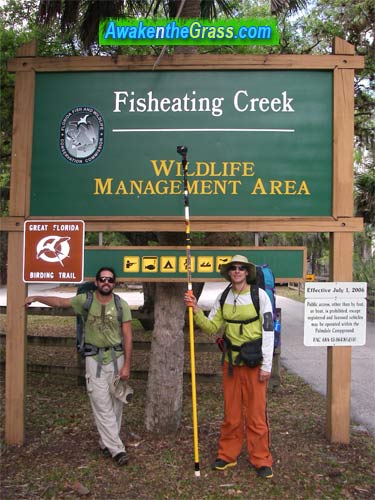
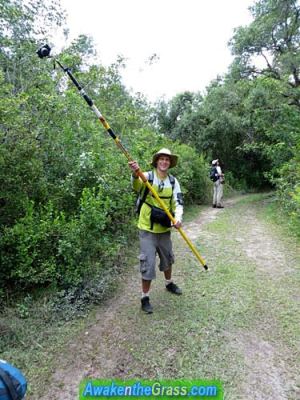
This is the shortest pole I have and the only one I paid for. It’s a painter’s pole from a hardware store and goes up to 16 ft with a super light tip. The yellow pole is automatically an instant conversation starter wherever and whenever people are around! Actual hiking with the pole in practice means carrying it much like one would a long spear! I bet I could fight off a bear with it, or at least take it’s picture~ 😉
.

The Pentax Q is a tiny mirrorless cam pictured with the 03 fisheye lens.
It’s an excellent choice for aerial photography! 🙂
.
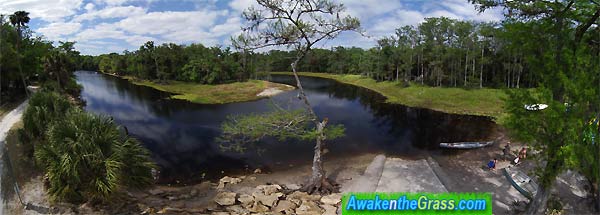
Result with pole above, aerial view of Fisheating Creek campground in Palmdale, Florida.
CLICK for VR superwide aerial panoramic!
Large panoramic prints also available!
.

Bird’s eye view aerial of Fisheating Creek at Ingrams Crossing in the dry season.
CLICK for VR 360 aerial panoramic!
Large panoramic prints also available!
.
.
.
.
Eye-level perspective vs. birds-eye!
.
.
.

.
||||||||||| Large panoramic prints also available – CLICK for more info! |||||||||||
.
.
.
:REALITY CHECK:
Sometimes, despite best care, it’s the little unexpected things that will get you. Recently while doing my aerial pole photography thing in another part of the world, everything was going great until I stepped off a 3 foot boulder which then unexpectedly shifted, causing me to step off the wrong way and nearly breaking my ankle. That hurt really bad (but I expect to recover fully – T.G!). In the middle of the incident I let go the pole and my Pentax Q hit the rocky ground – breaking the rear LCD glass.
.
.
Enjoy and keep it SAFE friends!
.
.
.
:WARNING:
I am describing to you my method and only what has worked for me. Use any and all information at your OWN RISK! If you decide to try some aerial photography, know that what goes up must come down. Use common sense and be mindful of your surroundings and aware of the situation you are in! There is a real risk of TOTAL equipment loss!
Think, twice – no three times before deciding to do anything like this in a populated area and watch out for power lines and trees!
Your flying camera can seriously hurt you and/or other persons and property – PAY ATTENTION!!
:WARNING:
.
.
.
© 2012-2017 Flex Maslan / kayakfari.com / awakenthegrass.com. All original photographs, artworks and music in this portfolio are copyrighted and owned by the artist, Flex Maslan, unless otherwise noted. Any reproduction, modification, publication, transmission, transfer, or exploitation of any of the content, for personal or commercial use, whether in whole or in part, without written permission from the artist is strictly prohibited.
All rights reserved!
…
DISCLAIMER:: The maps and images on this site are not intended for navigation, I am not a guide; use any and all information at your own risk! Your mileage may vary .. so use good judgement before venturing out!
With that said.. Blessings friends!









Great training blog on your technique. Thanks. I have tried the kite bit, but you can’t count on the wind for help. I have used a GoPro with a pole; but between bad batteries and not enough practice, NOT MUCH.
– THANKS, Scott
LikeLike
Wow! Great idea! I thought about doing something like that to get closer to birds in the tree tops, using a remote control to fire the camera.
LikeLike
Flex once again well said and a great series of pics..
LikeLike
I put a Nikon 7000 on a 12 foot painters pole. Attached to the camera is a small box that plugs in and transmits an image from the camera to a small wireless viewer that is effective quite a distance away. Seeing what the camera see is a big advantage when taking the pics. The viewer also can trigger the camera to take the picture.
LikeLike
Also curious about your pole that is lightweight yet rigid enough not to be bouncing around with the camera attached. Also I use a Pole Pixie to attach the camera to the painter pole. If you dont know what that is its an aluminum piece that has a coarse broom thread on one end and a 20 thread on the other end to attach a tripod head to. It then attaches to your camera
.
LikeLike
Hi Paul, thanks for your comments. Your setup with a DSLR sounds interesting especially if you’re not using a fisheye or ultra-wide lens. I’ve found that with the fisheye aim isn’t critical, just need a lot of overlap. I have something similar to the pixie adapter that I use with my shortest pole, it works good. This brings me back to weight – I moved on to the lightest setup, including the cam, lens and angle head. I’m preparing a follow-up story on the technical aspects, look for it here shortly!
LikeLike
Thanks for your reply. I also have a couple GoPro 3 cameras and putting one on a very tall pole similar to yours would be pretty easy. What is your pole? Its more than a painters pole so Im curious how I can purchase one. Here is the problem. I want something I can set up. I found a 12 foot pole is the maximum one I can easily handle. Longer than that and its difficult to set it up. Over the 12 or even 15-18 foot length and Im baffled. Id like something that will close down to about 6 feet in height and telescope out to 30 feet (would be nice). Is that possible with your pole?
LikeLike